How to Make Your Own Smoking Pipe
Making your own smoking pipe is not an easy task, especially if you want the result to be more than just a block of wood with a stem sticking out of it. However, if you possess some patience and practice some determination you may be surprised at just how capable you are of producing your own practical smoking instrument. We sincerely wish that all pipe smokers were inclined to make a pipe of their own, even if only for the sheer pleasure of trying. Now that we’ve begged you, we’ll tell you how!
Tooling
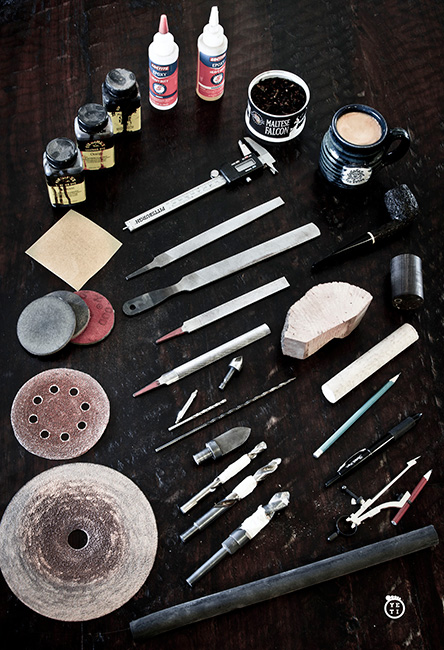
There are manly men who can make smoking pipes using only sandpaper and hand tools, and then there are the rest of us. Having some larger machinery including a lathe, a bandsaw, a drill press, and a benchtop disc sander makes the process shorter and infinitely easier. We speak from experience as we’ve tried both methods with much greater success in the latter. Though power tools are fun to use and make jobs like drilling the draught hole and chamber, shaping the stummel, and crafting the stem much easier tasks, its obvious that most fledgling pipe makers won’t have one or more of these tools at their disposal at the onset. There’s no reason to start worrying, however. You can make a perfectly capable smoking pipe using tools that most of us already own, or could obtain for a relatively small investment; a hand drill, dremel/rotary tool, and a good set of files and rasps will get you rollin’. You can shape a pipe from start to near finish with good files and rasps, (although it will test those burly arms of yours) and polish it off with some sandpaper. Once you’ve mastered the basics, understand the general concepts of pipe making, and gotten a few pipes under your belt, then it’ll be time to start thinking about investing in tools that will significantly speed up the process and help you create a higher grade smoking instrument. Until then, don’t be discouraged by lackluster results… the David wasn’t Michelangelo’s first sculpture.
Materials
Acquiring the right materials is very important. Fabricating a pipe out of pinewood and Play-Doh would be quite cost-effective, but otherwise regrettable. Our pipe-kits come with the best quality Italian briar (from Mimmo himself), and a perfectly shaped and drilled acrylic stem. Here’s a basic description of these 2 essential pipe materials:
Briar
Stem
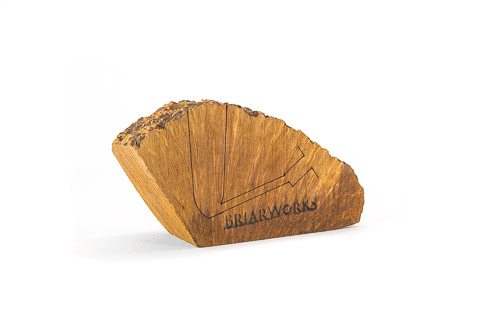

Pipes can be made from corncob, meerschaum, olive wood, cherry wood, strawberry wood, ancient morta, clay, and perhaps other materials as well, but briar is considered to be the ultimate material for making pipes. Briar is a type of wood harvested from erica arborea, or “heath tree”, and it’s prized in pipe making for its very high heat tolerance, respiration, hardness, and beautiful grain. It is as expensive as wood goes, mainly because until a heath tree is approximately 40 years old its briar is not considered to be ready for harvesting. Once harvested, the briar must be boiled and dried to remove sap and moisture, but the process is long and must be carefully controlled to prevent the briar blocks from drying too quickly, which can result in splits or fissures in the wood. Briar can be cut two different ways, and each way yields a unique looking block. The more affordable “Ebauchons” are briar blocks that have been cut across the grain, while the pricier “plateaus” are cut with the grain and maintains the craggy outer surface of the briar burl. We carry both an ebauchon and a plateau pipe-kit.
The most commonly used stems by fledgling pipe makers are injection-molded stems that can fit just about any pipe style. They are usually made of ebonite (also called vulcanite), which is a specially treated rubber with a high sulfur content. They can also be made from black or colorful acrylics. Each type has their pros and cons. Ebonite is softer and a bit more comfortable if you grip it in your teeth, but it shows teeth marks more easily and will yellow over time. Acrylic stems are harder, but don’t scratch as easily and won’t fade or change color. Either way, these stems usually need some TLC before they are truly finished, but that’s easier than cutting, shaping, and drilling your own stem from raw ebonite or acrylic rods, which is your other option. Our acrylic pipe-kit stems come polished, with the draught hole trumpeted at the bit end, and their tenons already turned, faced and fitting perfectly into the pre-drilled mortise (no frustration required). If you purchase pre-formed stems elsewhere expect rough edges, a wide, un-turned tenon, and no trumpeting of the draught hole. You’ll have to do all that work yourself.
Preliminary Design and Mechanics
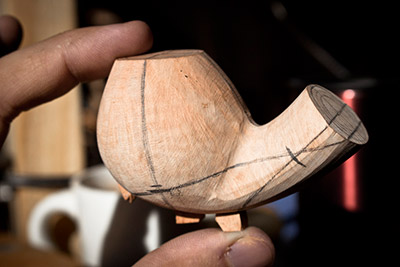
Once you have selected the piece of briar and stem that you will use for your pipe, it’s time to start drilling. Our pipe kits all come pre-drilled to perfection and are ready to be shaped, but here is the process for those with the tooling to do it from scratch. Precision is key here, as a hole drilled at the wrong angle, in the wrong place, or of the wrong diameter can ruin the function of the pipe. Make sure to draw all the holes you will be drilling (draught, mortise chamber) onto the side of the briar block so you can use them as a guide. Getting the sizes, lengths, and angles on there will remove a lot of guesswork. When you’re ready, use a vice to hold the briar block steady as you line up to drill. Whether you are using a drill press or a hand drill, a vice is a must. You’ll want to drill the holes in the following order:
The Draught Hole
The draught hole is pretty important. It’s the channel through which that tasty smoke gets to your mouth, after all. What makes it difficult to get right is that its usually pretty long (and you can’t see through briar to check if it’s straight). If your drilling starts off askew from the lines you’ve drawn on the block, the error will be magnified at the end, so make sure to take your time with this (or just buy a pre-drilled pipe-kit!). It should be drilled with a long, skinny bit. Something in the range of 5/32” or 4mm is about right. Waxing the bit with hard carnauba wax before drilling can help prevent burning the interior of the channel. To make sure you don’t drill the draught hole to far, measure the length of the draught hole line (say it’s 3″). Now mark 3″ up on your drill bit and you’ll know when to stop drilling.
The Mortise and Tenon
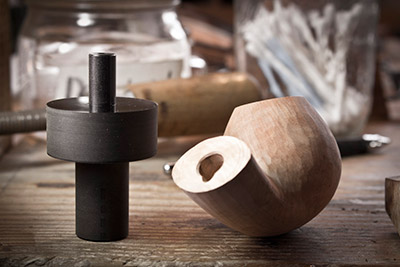
Since a good marriage between the mortise and tenon is essential for a good smoker, these are best worked on together. The mortise should be drilled in the same diameter and length as the tenon to avoid creating gaps where moisture will accumulate while smoking. This can be fairly simply accomplished using an appropriately sized forester bit and a drill press or hand drill. You can turn your tenon using either a lathe or a special tenon-turning tool attached to your drill press or a hand drill. Lathes are big and expensive, and using the tenon-turning tool gave us nightmares, but unfortunately there aren’t many other options out there. Popular diameters for the mortise are 9/32” and 5/16”, so turn your tenon accordingly, checking the fit constantly (tight, but not too tight being the idea fit).
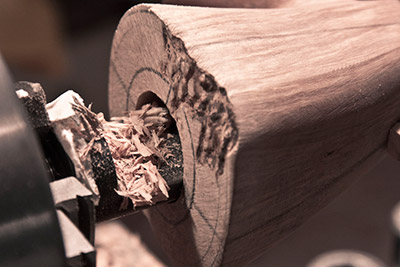
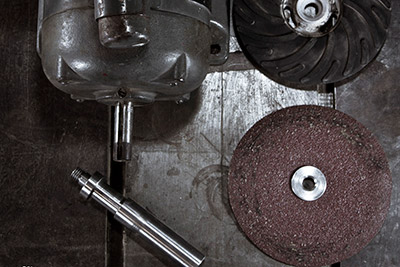
The Chamber
The chamber is a tough one, since the bottom of your chamber should be conical or round, not square as would be achieved with a Forstner bit. There are specially made bits for drilling tobacco chambers ranging in price from a few dollars to $100+, but the cheap ones will do for your first few pipes! If you have bench grinder you can round off the edges of cheap spade bit, or just pick up a pre-rounded spade bit from one of several sources online. 3/4” is the most popular size for tobacco chambers, but for larger pipes, you may choose to go with 7/8”. Use your chamber drawing as a guide and drill slowly but surely, checking for signs of the draft hole often the deeper you go. Once you’ve drilled deep enough that the entire diameter of the draught hole is barely visible, stop! You’re done!
The Fun Part… Mostly
Getting the mechanics just right or even mostly right can be quite frustrating. That’s why most fledgling pipe makers are quite happy to move on to the more creative and rewarding parts like shaping and staining (our pipe-kits allow you to start your pipe making journey right at this step!). These steps are not without their sand-traps however. Just wait until you sand the sides of the bowl down to far and can see light filtering in through a hole in the side of your chamber. Or, when you think you did a great job finish sanding only to find out your pipe is a scratched up mess after you’ve done the final buffing. Don’t worry, we’ve got the directions you need and some tips to help you avoid some rookie mistakes.
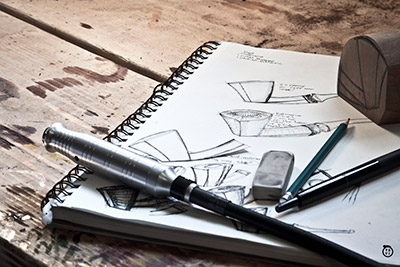
Shaping
Shaping is fun… really fun. This is when the vision of you pipe (however good or bad it was) starts to become reality. How easy this task is accomplished once again depends upon the tools at your disposal. I’ll break it down this way…
You have a:
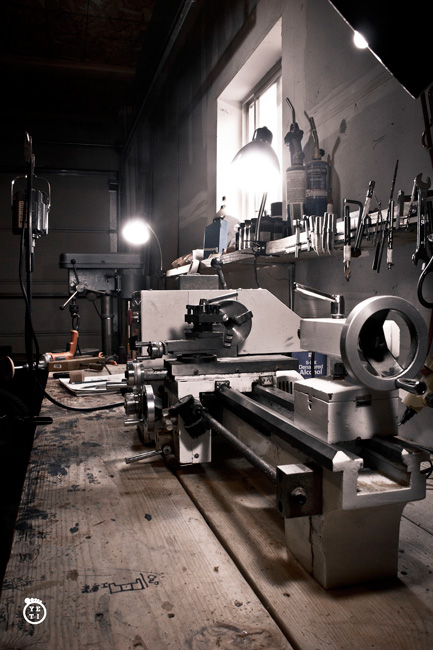
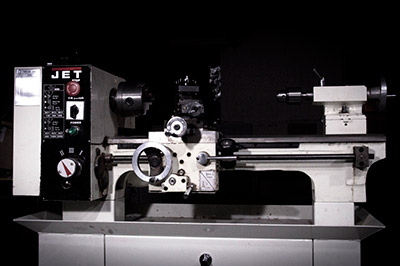
Metal lathe
Awesome! Almost all the pros make a good deal of their pipes this way. Shaping will be limited to shapes that have congruent sides (i.e. billiards, princes, etc.), but in theory this method produces the most consistent pipes. With a metal lathe you can also opt to shape before you drill although we don’t recommend you try this until you’ve got some experience. For more on “shaping before drilling” check out the Pipe Maker’s Forum.
Disc or belt sander
You can create any pipe shape you want! Every professional pipe maker has one (or a few) of these and most of the great Danish pipe makers use disc sanders exclusively for shaping. You will want to get sanding discs of various grits (think 60 to 180 grit), and work your way up as your pipe shape becomes more defined.
Dremel or rotary tool
Shaping a pipe from start to finish is definitely doable with a dremel tool. It’s going to be a longer road and you’ll need much more patience, but it can be done… we’ve done it. You can get the little barrel shaped sanding discs in various grits so you can shave off more or less wood depending on what shaping stage you’re at. If you go with a Dremel, stick to a more simple, tried-and-true shape like a billiard, apple. Anything much more complex would be pushing the limits in our opinion.
Files and rasps
These technically can get the job done, but that’s really pushing it. If all you had to work with was files and rasps it would take quite a long time to finish and the end product wouldn’t look as polished. Regardless, files and rasps are essential additions to any one of the shaping methods/tools above. They are necessary for getting in and removing briar from tight spaces that would otherwise be nearly impossible with just the above tools.

Fingernails, kitchen knife, broken bottle
Are you a descendant of Michelangelo? No… good luck!
Sanding, Sanding, and More Sanding
Only move on to this step until you have your shape completely defined using one of the above shaping methods. If you get ants in your pants and move on to early, thinking you can remove a lot of the remaining unwanted briar with sand paper, you will realize that you were stupid. At this point, buckle in, put some music on and get ready to sand your fingerprints away. Ok, we’re being dramatic, but this is both a tedious and extremely important stage. Starting with 120 grit sandpaper, you are going to be sanding every nook and cranny of your pipe. Then move onto 220, 320, 500, and finally (if you want it to be literally as smooth as a baby’s bottom) 600 grit. Trust us, if you don’t sand diligently with every grit, you WILL be surprised at how many scratches are left after the final buffing that you could not see while sanding. If that isn’t that important to you, than no worries.
Finishing
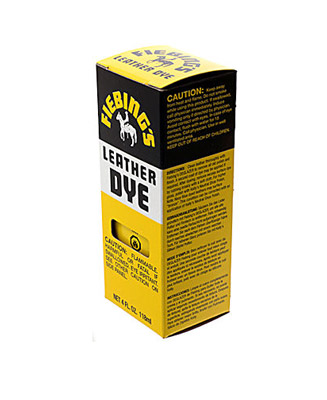
Pre and Final Staining
The pipe makers stain of choice is Fiebings leather dye. It comes in a variety of colors and if none of those suit your fancy, you can mix them to your heart’s content. It is readily available at Fiebings own website. All it takes to apply the dye is a pipe cleaner.
Pre-staining is optional, but does lead to a finished pipe with greater grain contrast. It involves staining the whole pipe in black, or a darker dye color, and then sanding it away, with the highest grit you finished sanding at, until only the stain deeply absorbed into the grain remains.
Whether you pre-stain or not, final staining comes next. It is quick and simple. Using a pipe cleaner, stain the whole pipe with your desired color, working quickly so you don’t get a blotchy finish. One coat usually does the trick, but if you want a darker finish go for a second. Oh, and our friend Wayne Teipen would be disappointed with us if we didn’t stress the fact that you should never stain your chamber! Just stick a cork in the chamber (no joke) before you begin and then stain away. Let the pipe dry to the touch (about 10 minutes if it’s not very humid) before continuing.
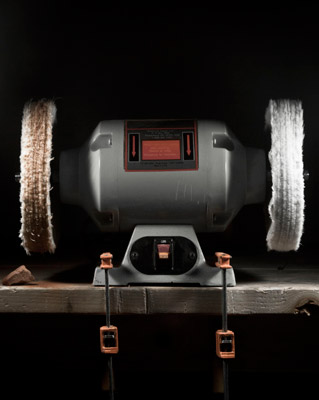
Buffing
Ahhhhh you’re almost there. Now ideally you would have a benchtop buffing setup for this. We use a bench grinder with the guards and grinding stones removed, replaced with muslin and flannel buffing wheels. If you don’t have this setup, you can get miniature buffing wheels for your Dremel/rotary tool.
You’ll want to get yourself some red or brown tripoli compound and carnauba wax. Get your buffing wheels spinning and hold the tripoli compound up to the muslin wheel for just a couple of seconds to apply it to the wheel. Bring your pipe up to the wheel (steady now) and begin to buff the whole pipe. Make sure you have a firm grip on the pipe and don’t push it into the wheel too aggressively or it will rip it out of your hands and bounce it all over your shop (as Phil can attest to MANY times). Tripoli compound is actually a very very fine abrasive that removes teeny tiny scratches from the surface of the pipe.
Finally, repeat on the flannel wheel with the carnauba wax. This is when your work will really start to shine and your diligent sanding proved, because if your pipe still has scratches, this is when they will show up. But, we know you’ve done a flawless job!

Information
If you need more information along the way, getting it happens to be, surprisingly, very easy when it comes to making pipes. Visit the well-beloved Pipe Maker’s Forum to get expert advice on just about every necessary procedure from drilling the first hole to polishing up your finished masterpiece!
There aren’t many things more satisfying than drawing puffs of smoke from your own handmade smoking pipe. Do yourself a favor and give it a try! Our pipe kits make it easy as pie to get into the hobby by eliminating the steps requiring the custom bits and expensive machinery. You may find, as many have, that pipe making will become a favorite past time, or perhaps even a new career!